

The Internet has become the basic necessity of modern life. And that’s why we all want to stay connected everywhere, at anytime. It’s not easy though, with the Internet connection dropping at inopportune times and the signal slowing down and becoming unstable.
When we have no internet connection, all of a sudden we are feeling a little bit powerless. How can we connect with our loved ones? How can we do our work? These are all common questions asked by the users when they have no internet connectivity at the time of their need.
But, how can we fix this issue? What are the ways to connect when we have no internet? Here are some tips that can help you out when you have no internet connection. Do you find yourself unable to connect to the internet? Or your browser is crashing? Or your computer seems to be freezing? Or…?
The symptoms may range from common but annoying to downright terrifying, so we’ve put together a little guide for you. If you have trouble connecting to the internet, you can click here to read the solution to your problem… Read more about reset network settings windows 10 and let us know what you think.
Ivan Jenic’s contribution
Expert in Troubleshooting
Ivan has gone deep into knowing this operating system, with a specialty in drivers and driver problems, thanks to his passion for all things Windows and his natural curiosity. When he isn’t tackling, he is… Continue reading
- If your Wi-Fi adapter fails on Windows 10, you’ll have to rely on the wired connection until you take action.
- Following a Windows upgrade, several customers experienced problems with their wireless connections.
- The most common reason is a problem with network adapter drivers.
We suggest Restoro PC Repair Tool to repair a variety of PC issues: This program will fix common computer problems, protect you against file loss, viruses, and hardware failure, and optimize your PC to run at its best. In three simple actions, you can immediately fix PC problems and eliminate viruses:
- Download the Restoro PC Repair Tool, which includes patent-pending technologies (patent available here).
- To identify Windows faults that may be causing PC difficulties, click Start Scan.
- To address problems that are impacting your computer’s security and performance, click Repair All.
- This month, 0 readers have downloaded Restoro.
Following a Windows 10 upgrade, you may experience a variety of software and hardware-related problems. One of these issues is that some users’ Wi-Fi adapters are no longer functioning.
They said that their PCs were unable to identify and recognize the wireless network adaptor, which had previously functioned well. Don’t worry, we’ve got lots of solutions for you.
If you can’t connect to the same network with any device, start by troubleshooting the local network, beginning with your router.
If you need more help, we also have a great tutorial on how to identify the home network in Windows 10.
What might cause the Wi-Fi adaptor to fail?
If the Wi-Fi adapter isn’t functioning, you’ll need to use an external Wi-Fi adapter or connect to a wired network temporarily. In any case, you’ll need to solve the issue, therefore here are some frequent causes of this problem:
Malfunctioning drivers — It’s common to have issues with drivers that aren’t operating correctly, especially after an OS upgrade. The problem may be resolved by updating them as shown below.
Incorrect settings — Some adapter settings may have been altered without notice, affecting its operation. The adapter is broken – Although improbable, if the issue occurs after your laptop has been dropped, you should suspect that this component is broken.
Other problems with Wi-Fi adapters
Here are some more problems that may be resolved using the solutions listed below:
- There is no Wi-Fi option in Windows 10 – The Wi-Fi button on the taskbar may be missing at times. Nonetheless, the same methods may be used to address this issue.
- The Wi-Fi adaptor in Windows 10 is missing – You won’t be able to view the adapter in Device Manager if your computer doesn’t recognize it.
- My Windows 10 Wi-Fi often disconnects — One of the methods listed below will also repair your connection if it is unreliable.
- There is no Wi-Fi option in Windows 10 settings – The Wi-Fi option may vanish from the Settings page, just as it did on the taskbar.
- Wi-Fi is turned on in Windows 10, but there is no Internet access — This is the worst case scenario: everything seems to be in order, yet you can’t connect to the Internet. But don’t fret; by following the steps outlined below, you’ll be able to fix the problem.
What should I do if my Wi-Fi adaptor fails?

- Drivers for networking should be updated (Internet needed)
- Use the Network Troubleshooter to find out what’s wrong with your network.
- Network adapters should be reset.
- Using Command Prompt, make a registry change.
- Adapter settings need be changed.
- The network adapter should be reinstalled.
- Your adapter should be reset.
- Update the firmware on your router.
- Toggle the Maximum Performance mode on.
- Ensure that there are no Wi-Fi issues.
1. Install the latest network drivers (Internet needed)
- Select Device Manager from the context menu when you right-click the Windows Start button.
- Locate the Wi-Fi adapter in the Network adapters section, right-click on it, and choose Update driver
- Select the first option, Search for drivers automatically.
- If a new driver is found, the system will install it and ask you to restart.
- You may also get the notification that the best driver is already installed, and you may use Windows Update to search for updated drivers.
- You’ll be sent to the Windows Update area, where you must choose View optional updates. (You won’t see the option if you don’t have any optional updates waiting.)
- Check the boxes next to the drivers you wish to install, then click the Install button.
Only if you have an Ethernet cable connection in addition to your Wi-Fi will this option work. If it doesn’t work, try downloading the required drivers from another computer or device.
To get the best drivers for your network adapter, go to the manufacturer’s website and type in “drivers for your network adapter.” While we’re at it, you may want to look into various Wi-Fi adapters that will work with your Windows 10 setup.
Now you may download the drivers, copy them to your computer, and start the installation. Hopefully, installing a new set of network drivers will fix the issue. If you don’t want to go through the trouble of looking for drivers on your own, you may use a program called Restoro to do it for you.
Of course, you won’t be able to utilize this program since you can’t access to the Internet right now. However, once you’re online, you’ll be able to keep all of your drivers up to date, preventing similar problems in the future.
2. Make use of the Network Troubleshooter

- To access Settings, use the Windows key + I.
- Head over to Updates & Security.
- From the left pane, choose Troubleshoot and then Additional Troubleshooters.
- Click the Run the troubleshooter option after selecting Internet Connections.
- Continue following the on-screen directions and wait for the procedure to complete.
- Your computer should be restarted.
3. Reboot your network adapters
Although resetting the network adapter may be extremely effective, take in aware that it will also delete any stored Wi-Fi passwords and Bluetooth connections. Before following the instructions below, make a note of the passwords and settings.
- Choose Windows PowerShell from the Start Menu button by right-clicking it (Admin)
- In Windows Powershell, type or paste the following lines, then hit Enter after each one:
- reset winsock netsh
- int ip reset netsh
- /release ipconfig
- /renew ipconfig
- Restart your computer and check to see whether you can now connect to Wi-Fi.
4. Use Command Prompt to make a registry change
- To launch Command Prompt with full rights, type cmd into Windows search and choose Run as administrator.
- Press Enter after pasting the following line: netcfg –s n n n n n n n n n
- A list of network protocols, drivers, and services will be shown by this command. Check to see whether DNI DNE is listed; if it is, you have a problem.
- If DNI DNE is mentioned, enter the following line in the same Command Prompt window and click Enter: HKCRCLSID988248f3-a1ad-49bf-9170-676cbbc36ba3 /f reg delete dni dne dni dne dni dne dni dne dni dne dn
This should fix the problem, but if you get the error 0x80004002 after running the program, you’ll need to remove this value in a different way.
If you get this error code, here’s what you should do:
- Open the Registry Editor by going to Search and typing regedit.
- HKEY CLASSES ROOT/CLSID/988248f3-a1ad-49bf-9170-676cbbc36ba3 is the path to go to.
- If DNI DNE is still present, delete it.
5. Make adjustments to the adapter’s settings
- Click the Start button, enter control panel into the search bar, and then choose Control Panel from the list of options.
- Select Network and Sharing Center from the drop-down menu.
- Change the adapter settings by clicking on it.
- Right-click the wireless adapter and select Properties..
- Under the choices that appear, look for Internet Protocol Version 6 (TCP/IPv6) and uncheck it to deactivate it.
- To make the changes stick, click OK and restart the computer.
6. Uninstall the network adapter and reinstall it

- Choose Device Manager from the list when you right-click the Start button.
- Expand the Network Adapters section by clicking on it.
- Uninstall device by right-clicking your network adapter.
- Follow the on-screen directions for the rest of the process.
- Your computer should be restarted.
- Now, follow the steps in the first solution to reinstall the network adapter driver.
7. You should reset your router
You must reconfigure your router once it has been reset. As a result, take notes on the current setup before resetting it.
- Look for the Reset button on the device’s rear.
- Press and hold the button for more than 10 seconds, or until the SYS led begins to flash rapidly, then release it.
As clichéd as it may seem, resetting your network adaptor may work wonders. So, look up the instructions for your router.
We provided instructions on how to reset a TP-Link router, but your router’s process may vary, so check the device’s handbook or the manufacturer.
8. Update the firmware on the router

- Connect the router to your computer using an Ethernet wire.
- Open a web browser and enter the router’s IP address or link (for example, our router’s IP address is 192.168.0.1, but yours may vary).
- Now type in the username and password given by the manufacturer (in the handbook or on the device’s bottom) or the ones you set the previous time if you’ve changed them since then.
- Find the version number in the Firmware section and write it down. Different routers may have the firmware number in other menus, so go through them all until you find it. A Check button on certain routers will lead you directly to the manufacturer’s firmware update website.
- Locate the most recent firmware on your manufacturer’s Support website and download it.
- Return to the router interface’s Firmware section and locate the Choose file or Browse option, which will allow you to add the firmware you downloaded.
- Allow the procedure to complete without interfering.
Updating the firmware on your router may fix the issue, but it’s not an easy process.
As a result, your best option is to consult the user manual for your router for further information on how to upgrade it. Call the manufacturer for help if you can’t locate the printed or online manual.
Just keep in mind that if you don’t correctly update the router, it may be permanently damaged. As a result, proceed with caution.
You may want to have a look at our more comprehensive tutorial on how to upgrade your router firmware for additional router manufacturers.
9. Select Maximum Performance from the drop-down menu
- Click the Start button, then type power management in the search tab, and open Power & Sleep.
- Go to Additional Power Settings under Related Settings.
- Locate your current plan in the Power Options box and click Change plan options.
- Select Change advanced power settings from the drop-down menu.
- Set the Power Saving Mode to Maximum Performance under Wireless Adapter Settings.
- To save the changes, click Apply and OK.
Keep in mind that the Maximum Performance option will put more strain on your device, resulting in a shorter battery life for your laptop.
10. Resolve any Wi-Fi signal issues
The Wi-Fi signal may be disrupted by appliances and devices that aren’t connected to your computer. Microwave, for example, is known to degrade signals.
As a result, ensure sure there are no appliances near your router that may potentially interrupt the signal.
How to Prevent Wi-Fi Connection Issues
Select a channel that is less congested.
To find possible problems, run a System Scan.
To detect Windows problems, click Start Scan.
To solve problems with Patented Technologies, click Repair All.
To identify faults causing security issues and slowdowns, do a PC Scan using Restoro Repair Tool. The repair procedure will replace damaged files with new Windows files and components once the scan is completed.
Changing the wifi channel on your router may help you avoid traffic and connectivity issues significantly.
To do so, go to your router’s setup menu and look for the wireless settings, which are typically found in the Advanced settings section.
Now, instead of leaving it on automatic, choose the Channel menu and set it to a value, as seen in the picture above.
Of course, the settings on your router may vary, so consult the directions in your product’s handbook.
Switch between 2.4 and 5 GHz.
It’s a good idea to move between the two frequencies if you have a dual-band router
The frequency settings are typically found in the Wireless Settings menu on your router, as seen in the picture above.
They may vary depending on your device, as previously stated. As a result, feel free to check your device’s handbook.
Remove any gadgets that you don’t want.
You may have neglected to tell certain friends and particularly neighbors your router password, and they may still be able to access to your Wi-Fi network.
To remove them from your network, browse to your router’s settings and search for connected devices, then delete any that you don’t recognize.
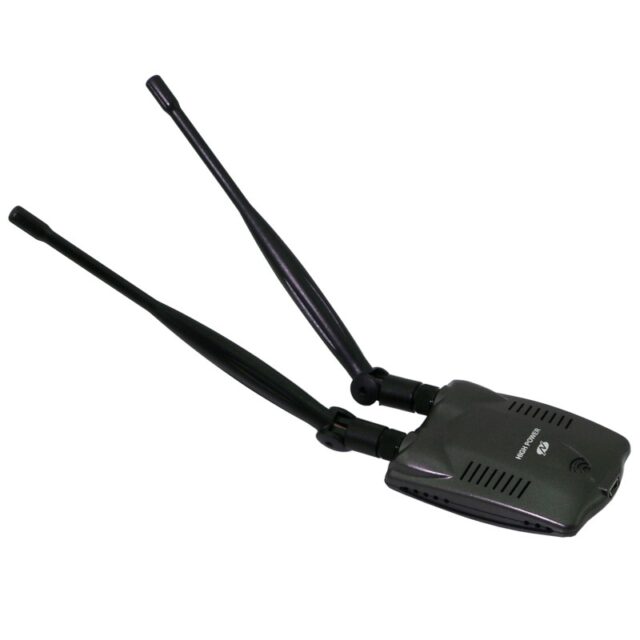
Upgrade your gadget (change your Wi-Fi card)
Although your Wi-Fi card or adapter is typically built into your motherboard, you may still utilize an external one.
If you find that the one you have isn’t functioning correctly, you may replace it with a new Wi-Fi adapter that better suits your requirements.
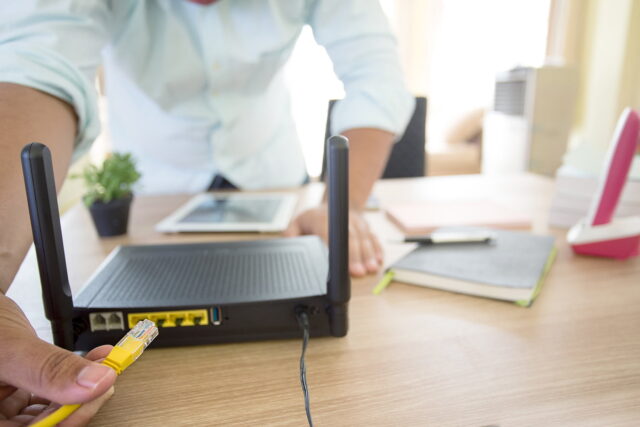
Obtain the appropriate router for your requirements.
When it comes to your home network, be sure the router can offer signal coverage no matter where you are.
It’s either an issue with the router or the signal power to your device if the connection continues breaking from time to time.
You may also choose one of the finest routers with an integrated antenna, but keep in mind that your device must remain within range.
Ensure that your drivers are up to date.
As we said in our tutorial, drivers may create a lot of problems with Wi-Fi adapters and other devices, so it’s best to keep them up to current at all times.
Choose the best Wi-Fi hotspot
Although it may seem amusing, we may occasionally connect to a slower or more congested network by accident.
Since a result, make sure you connect to the quickest network possible, ideally your own, as your neighbors may not like it if you connect to theirs instead.
We’ve all had difficulties with our Wi-Fi hotspots at some time, but they’re typically caused by signal issues or the ISP itself.
As a result, if you’re having trouble connecting to the Internet, check to see whether you have a valid ISP connection and that your router or access point is operational.
Check whether other devices can connect to the Wi-Fi hotspot after that, and if they do, you may assume there is an issue with your device.
As a general guideline, start with the most fundamental problems and work your way up to the more complicated ones.
If none of these remedies worked, see our post on Internet difficulties in Windows 10, where you’ll discover more helpful tips and techniques.
If you have any questions, comments, or ideas, please leave them in the comments section below.
Are you still experiencing problems? Use this tool to fix them:
- Download this TrustPilot.com-rated PC Repair Tool (download starts on this page).
- To identify Windows faults that may be causing PC difficulties, click Start Scan.
- To resolve problems with Patented Technologies, click Repair All (Exclusive Discount for our readers).
This month, 0 readers have downloaded Restoro.
Most Commonly Asked Questions
Was this page of assistance to you? 3
Thank you very much!
There are insufficient details It’s difficult to comprehend Other Speak with a Professional
There are 4 responses to this post.
As you know, most of the time the Internet is working as you would expect it to. But once in a while, you may start seeing some unexpected network errors. Maybe your connection to the server is down, maybe your DNS server isn’t resolving the hostname, and so you don’t know what is wrong. No matter what the problem is, there is a way to fix it, and here is how you do it.. Read more about can’t connect to this network and let us know what you think.
Frequently Asked Questions
How do I fix Internet connection problems?
You can try to restart your modem and router, or you can try to connect through a different device.
How do you fix poor connectivity?
Unfortunately, there is no fix for poor connectivity.


